
A security camera system is ideal for deterring criminals and keeping your home or business safe. But how do you go about installing one? In this blog post, we’ll walk you through the process step by step so that you can know your property is well-protected.
Step 1: Choose the right location
The first step is to pick the right location for your security cameras. This will vary depending on what you want to monitor. For example, if you want to keep an eye on your front door, you’ll want to mount the camera near the top of the doorframe, pointed down at an angle. On the other hand, a corner of the yard might be the best spot if you’re looking to monitor activity in your backyard. And if you want to keep tabs on what’s happening inside your home, placing a camera in a central location—like a living room or hallway—is often ideal.
Step 2: Drill holes and run cables
Once you know where to mount your cameras, the next step is to drill holes and run cables. Of course, you can always hire a professional if you’re uncomfortable doing this yourself. Just be sure to give them clear instructions on where the cameras are mounted and how you want the cables routed.
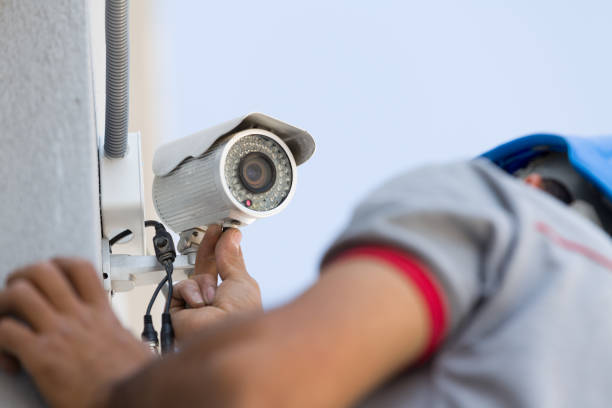
Step 3: Mount the cameras
Now that you’ve chosen the ideal location for each camera, it’s time to mount them. Start by drilling pilot holes into the wall or ceiling where you’ll be mounting the cameras. Then, use the screws that came with your camera kit to secure the cameras in place. Once all of your cameras are mounted, move on to step three.
Step 4: Connect The Cameras To The Power Source
Next, you’ll need to connect each camera to its power source. If you’re using battery-powered cameras, insert the batteries into each camera according to the manufacturer’s instructions. If you’re using wired cameras, run the power cord from each camera to an outlet or power strip. Once all your cameras are connected to their power source, move on to step four.
Step 5: Connect The Cameras To The DVR Or NVR
Now it’s time to connect your cameras to the DVR or NVR. If you’re using a wired system, plug the Ethernet cable from each camera into the appropriate port on the DVR or NVR. If using a wireless system, follow the manufacturer’s instructions for connecting the cameras to the DVR or NVR. Once all of your cameras are connected, move on to step five.
Step 6: Test the system
After everything is connected and installed, it’s time to test your new security camera system. Start by walking around your property and ensuring all cameras are recording properly. Then, check to see that the footage is stored securely and can be accessed from your security system’s control panel. Finally, you’re ready to start deterring criminals and keeping your property safe if everything looks good!
Wired or Wireless Camera: Which is Better?
As technology advances, so do our options for home security cameras. We now choose between wired and wireless models, but which is better? Here’s a look at the pros and cons of each type to help you decide which is right for your home.
Wired Cameras:
Wired cameras are the traditional option. They’re connected to your home’s electrical system and send their signal through a cable to a recording device, like a DVR. Because they’re hardwired, they’re more challenging to install than wireless cameras. But once they’re in place, they’re very stable and reliable.
There are two main types of wired cameras: Analog and IP. Analog cameras use an analog signal, subject to interference from other electronic devices. IP cameras use a digital signal that’s less likely to be disrupted.
Wireless Cameras:
Wireless cameras are the newest option on the market. They transmit their signal wirelessly, so there’s no need to run any wiring through your home. That makes them much easier to install than wired cameras.
Wireless cameras usually run on batteries, so you’ll need to monitor the battery level and recharge or replace them as needed. Some models have AC power adapters, but they’re less common.
One thing to remember with wireless cameras is that they can be interfered with by other wireless devices, like baby monitors and microwaves. So if you’re having trouble with your signal, try moving your camera or other devices around to see if that helps.
Which is Better?
There needs to be a clear winner regarding wired vs wireless cameras. It depends on your needs and preferences. If you want an easy installation, go with wireless. If you need a reliable connection, go with wired. In short, if you need more time, get one of each! Having both types of cameras gives you the best of both worlds.
Frequently Asked Questions
Q: Do I need a permit to install a security camera system?
A: You might need a permit, depending on where you live. Check with your local law enforcement agency or city hall to find out.
Q: How do I choose the right location for my cameras?
A: You’ll want to place your cameras in strategic locations that will allow you to see as much activity as possible. Work with a professional security camera installer to ensure you get the most out of your system.
Q: Will my security camera system be visible to everyone?
A: Not necessarily. Depending on your preference, you can choose to have your cameras hidden or in plain sight.
Q: How do I know if my security camera system is working?
A: Test it out periodically to ensure all the cameras are recording and that you can access the footage from your computer or smartphone.
Conclusion:
Installing a security camera system may seem daunting, but it’s fairly simple if you break it down into steps. Just decide on the type of system you want, purchase the necessary equipment, and follow our installation guide above. Then, your property will be well-protected against intruders in no time at all!